Wednesday, March 4, 2015

Bhindi/Okra/Ladies Finger Subji!

.
Bhindi subji

This is an 'easy to make' subji.

Ingredients:

1.  200 gms. Bhindi/Ladies finger cut into pieces.

 Ingredients for making the onion paste:

2.  4 Large onions cut into pieces.

3.  4 Green chillies.

4.  1" Ginger piece.

5.  6-7 cloves of garlic (You can add more if you like).

Ingredients for making the tomato paste:

6.  2 nos. Big ripe tomatoes (small means 3-4).

7.  5-6 nos. Cashew nuts.

8.  1 tsp. White til/Sesame seeds.

9.  1 tbs. Corn flour.

Extra ingredients:

10. 1 tsp. Garam masala. 2 tsp. if it is Everest/MRT garam masala

11. 1 tsp. Coriander powder.

12. 1 tbs. Red chilli powder.

13. Salt to taste.

14. 1 tsp. Sugar.

15. 3 tbs. Refined oil.

16. 1 or 2 tbs. of Butter.

17. 1 tsp. Cumin seeds/jeera.

18. 1/2 tsp. Haldi/turmeric powder.

19. Half or one capsicum (optional) 

20. 1/2 tsp. Kasuri methi

21. 1 tsp. Amchur/dry mango powder


First, cut the bhindi into small pieces as shown in the picture and microwave it for 3 mts. and keep aside.

Make the onion paste.  Place a kadai or a thick bottomed vessel on the stove.  Pour the refined oil.

Add the Jeera.

After a few seconds, add the ground onion paste. Then add butter, sugar, a tsp. of salt and haldi powder.  Stir it. The onion will become transparent after a few mts., say 5-7 mts.  See to it that it doesn't stick to the bottom of the vessel. 

After adding the onion paste, grind the tomato paste.  Keep it in the mixie jar itself.  Let the grains soak and soften.

Now, add the microwaved pieces of Bhindi and capsicum pieces. Add chilli powder, amchur powder, coriander powder and garam masala powder. Mix well and close it with a lid for 5 mts.  Let the vegetable soak in the masala. 

Now, grind the tomato mixture again.  If you want the gravy to be a bit thicker, add some corn flour. Pour the paste into the vessel.  Add more water (wash the jar and pour!).  Add some more salt. This is for the gravy! I add salt step by step! Close the lid.  Keep the ladle inside the vessel if you think that the subji will overflow.  Let it boil well.  The rawness of the tomato should go.  Add the Kasuri methi. Then switch off.  Some people add some milk after switching off. Taste it for salt!

Thats it! The subji is ready. If you like lemon taste/flavour, add it now and mix!

Write to me if you have got any doubt.  Tell me if it comes out well too!

Cut bhindi pieces.

Ingredients for making the onion paste. Pl.grind it without pouring water!

Ingredients for the tomato paste 


Bhindi subji is ready!


Tip: If you are new to cooking, keep all the ingredients in small cups or plates.  You will start using your own method of cooking after sometime.  So don't worry. You taste immediately after the last step and add chilli powder or salt and boil it.  It will blend well with the gravy.

You can take a printout and keep it on the side. 

Monday, March 2, 2015

Paalak/Spinach Paneer Subji!

.
Paalak Paneer subji
This dish is our family's favourite.  This time we had our own home-grown paalak.  So, I was happier to do it.  The leaves were very tender and the subzi tasted better! Let me tell you how I did it!

Now, to the ingredients:

1.  1 large bunch of paalak/spinach, washed very well.

2.  1/2 tsp. of sugar, 1/2 tsp. of haldi/turmeric powder.

3.  1/2 tsp. Salt.

Ingredients for the paste:

4.  2 Large onions cut into pieces.  Need not cut into small pieces.  This is for grinding, anyway.

5.  3-4 Green chillies.

6.  1/2" Ginger piece.

7.  4-5 Cloves of Garlic

Extra things:

8.   2 tbs. Refined oil

9.   1 tbs.Butter (you can skip this but the butter will enhance the creamy taste.

10. 1/2 tsp. Cumin seeds/Jeera

11. 1/2 to 1 tsp. Garam masala powder (click to get the recipe)

12. 1/2 tsp. Amchur powder

13. 1/4 cup milk

14. 1/2 tsp. Coriander powder

15. 1 tsp. Red chilli powder.

16. 1 tsp. corn flour

17. 200g. pack paneer/cottage cheese, sliced into small cubes.


First step:

Boil the greens with a little salt along with sugar, haldi and 2 cups of water for 2-3 mts.  Cool it. Then grind it a bit. It need not become too pasty.  Just 'drrr...'! This is our language for just turning the mixie 'on' for a second! You can add the corn flour also with this, while grinding.

Second step:

Grind the garlic onion mixture.  Soften the paneer if it was in the freezer and cut into small rectangular pieces. It should not be too soft so that it won't crumble while cooking and stirring. 

Third step:

Place a kadai on the stove.  Pour the oil.
Add cumin seeds.
Once the flavour of the seed starts, add the ground paste. Stir a little.
Add the butter.
Add some salt now.  It will make the onion paste transparent fast.
Once the raw onion flavour leaves from the paste and becomes transparent, add the paneer cubes.  Add the red chilli powder and coriander powder.  Mix it with the mixture. Close the vessel with a lid for one or two minutes, so that the paneer absorbs the masala flavour.
Low flame is better! Be near the stove when you do this! If you leave for long time, it might burn at the bottom of the vessel!

Now,  you can add the ground greens, amchur powder, garam masala powder (my garam masala powder is strong, so, half tsp. is enough.  If it is Everest or something else, one tsp. is needed).  Add enough water (wash the jar with some water and use it!). Cook it till bubbles come out.

Some people like the subji a bit thick and some a bit thinner.  Do it as you please.  Taste it for salt.  Always use less salt in the beginning and add more after tasting, if you are new for cooking! Add milk in the end.  You can add the cream of the milk too, which will make it tastier!

The Paalak paneer subji is ready!

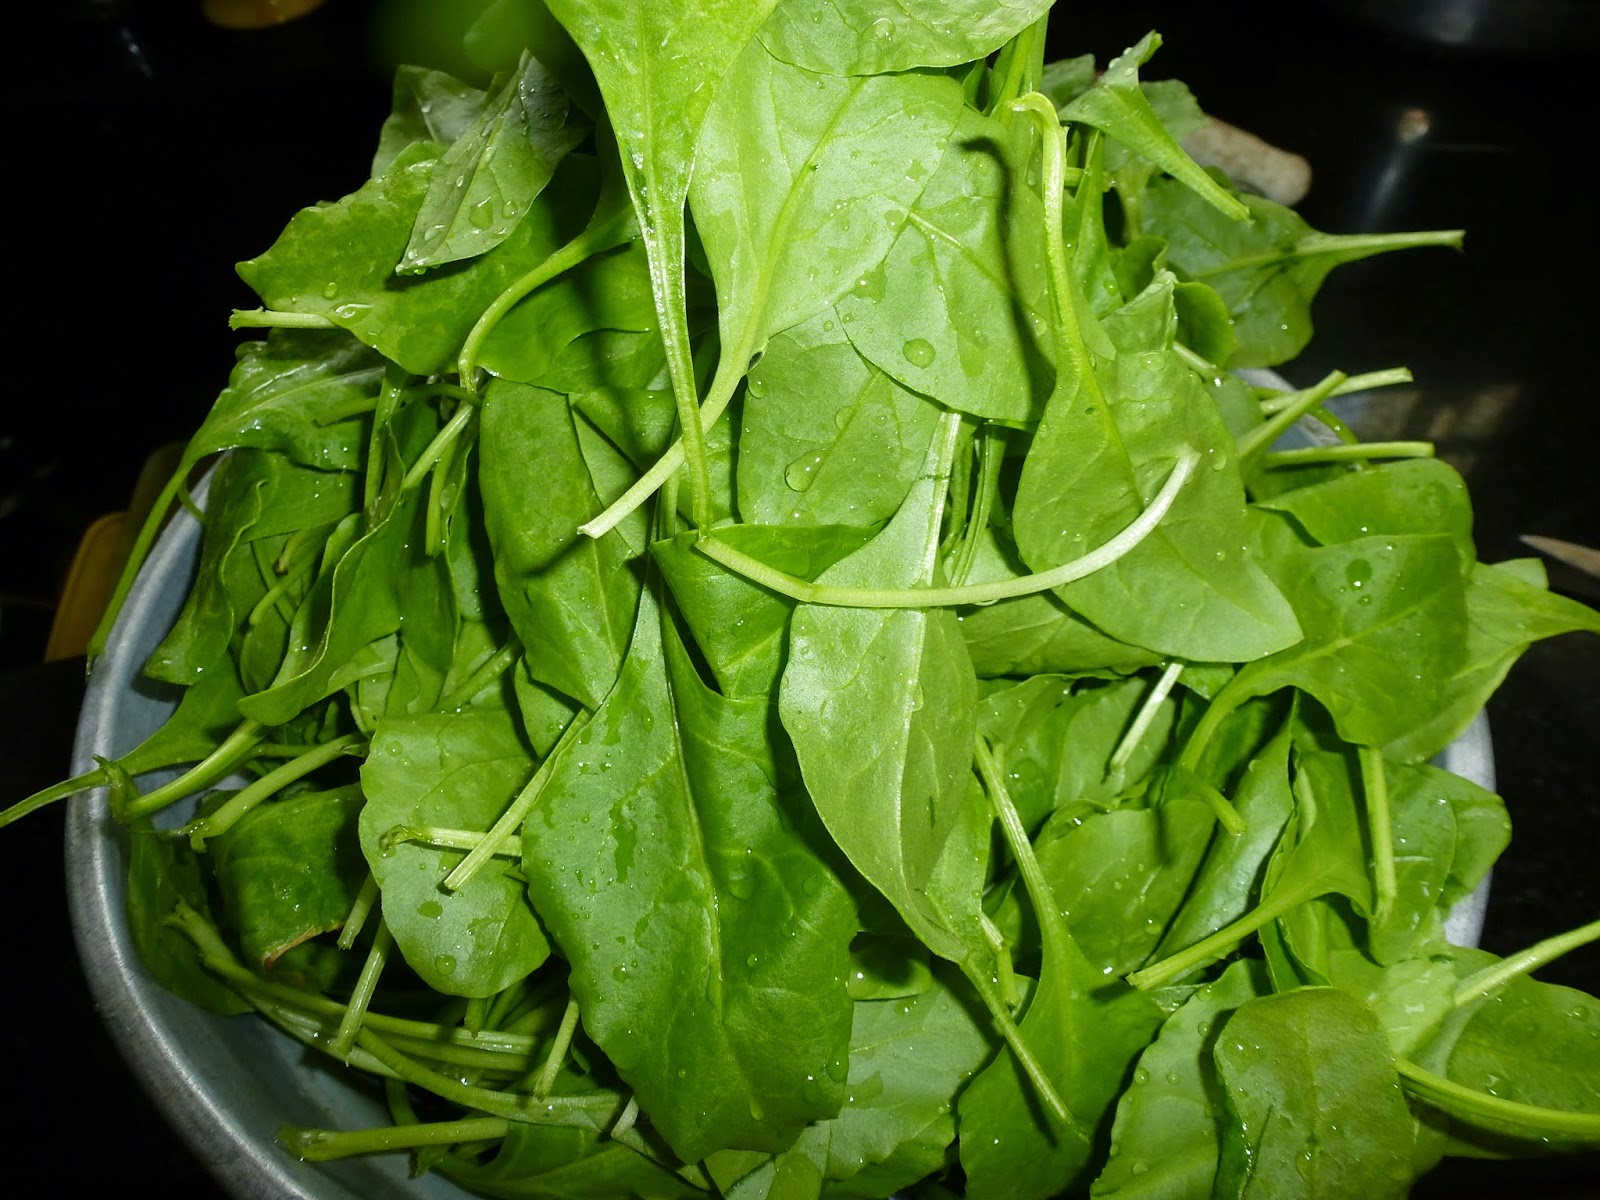
Plucked and washed paalak.  This is from our roof top garden! (link)

Cut paalak with a pinch of sugar, salt and haldi.


2/3 mts. cooked paalak.  If the leaves are very tender 2 mts. is enough.

Onion, garlic, ginger and green chillies for grinding. Grind without adding water!

The ground paste with paneer slices.
Sometimes, I add some capsicum pieces along with paneer.  I love the flavour of capsicum.  Half cooked capsicum is tastier! This is optional, though! 

Hope this recipe is easy to follow.  Please write to me if you liked it or if you need any suggestion, in the comment box.  Your comment will encourage me to write more!

.

Tip: You can use aloo/potato, boiled with salt, instead of paneer...Aloo Paalak!

Always add a pinch or half tsp. of sugar for all the subzis/currys/rasam etc. to enhance taste, like the Chinese add Ajinomoto!When you cook with tamarind (saambaar) add a small piece of jaggery/gud! Taste will be better.

Likewise, add some salt while frying onion to make it transparent faster!

Monday, December 2, 2013

Tomato-Garlic Chutney With Coriander Leaves' Flavour!

.
Tomato-Garlic Chutney
This chutney is famous among our relatives. Let me write the recipe now.  This is very easy to make!


Ingredients:

1.  1 and a 1/2 Kg. (or 15 nos.) Ripe Banglore Tomatoes.

2.  1 Full garlic, peeled.

3.  2" Ginger, peeled and sliced.

4.  6-7 Green chillies

5. 1 Green capsicum (Optional)

6.  2 tbs. Red chilli powder.

7.  1 bunch Coriander leaves, washed and cleaned.  You can include some Curry                 leaves too!

8.  1  tsp. Gharam masala powder.

9.  1/2 tsp. Turmeric powder (haldi powder).

10. 2 tsp. Cumin seeds (Jeera).

11. 2 tsp. Sugar.

12. Salt to taste (Around 1 1/2 tbs. for this ratio...you can taste and add more, later)

13. 1/2 cup Gingily oil or any cooking oil.


Method: 

Put these ingredients in a mixie jar...garlic, ginger, green chillies, 1-2 tomatoes, capsicum and grind first into a paste.

Place the kadaai or thick vessel in the stove and pour oil and then jeera (cumin seeds).  When the jeera begins to get brown in colour, add the above mentioned paste. You can smell the roasted jeera and that is enough.  Don't leave it for long in the oil.

Mix it with a ladle.

First round of grinding!
Pour this paste in the oil and mix well.
Second round of grinding. Always cut the tomatoes before grinding.

Cut the coriander and then grind with a couple of tomatoes.  You will be able to grind them into a paste fast.  Pour it into the vessel in the stove.  Stir it.

Grind all the other tomatoes and pour into the vessel.  Stir it.  Add haldi powder, sugar, chilli powder, salt etc.  Let it boil for nearly 20-25 mts. or until it becomes thicker.  Add the gharam masala powder.  Leave/stir for 5 more mts.

The chutney is ready.  Store it in an airtight jar.  Take the required amount of chutney in another vessel and use.  This can be used for a week or so for dosa, idly, chapaati or can be mixed with rice too!

I don't use onion in this chutney.  You can add it if you want a change in taste!

Please try this and tell me if you liked it.  Please write to me if you have got any doubt.


.

Saturday, June 1, 2013

Peerkkangai Thogaiyal/Ridgegourd Chutney and Simple Tomato Chutney!

.

Peerkkangai thogaiyal/Ridge gourd chutney

I make this chutney often at home for idly, dosa etc.  Everybody loves it. This vegetable, Peerkkangaai in Tamil, Heerekaai in Kannada and Ridge gourd in English is very good for health. The other name is Luffa! Wikipedia says: 

Its juice is used as a natural remedy for jaundice. The juice is obtained by pounding the bitter luffa and squeezing it through a cloth. Bitter luffa seeds and dry crusts are also available and can be used for the same purpose.

The centre/white spongy portion is a bit bitter sometimes, but mostly it is a bit sweet.  Anyway, taste it first, please.  I used to eat it raw while cutting the vegetable and used to give to my children too! Now, to the recipe:

Ingredients: 

1 Ridge gourd/peerkkangaai - 1 medium sized
2. Grated Coconut - Half

3. Mustard/Rai/Kadugu - 1 tsp.
4. Black gram/Urad daal/Uluththam paruppu - 1 tbsp.
5. Red chillies - 6-7 (or as per your taste)
6. Curry leaves/Kariveppilai
7. Asafoetida/hing/Perungaayam - 2 peppers' size
8. Coconut oil - 2 tsp.
9. Dry tam - 1/2 tsp.  or a small amount of tamarind/puli
10.Salt - as per taste.
11.Turmeric powder - 1/2 tsp.
12.Sugar - a pinch

Method:
Peerkkangaai!

First wash the vegetable properly.  Remove the top and tail of the vegetable.  Remove the projecting portion like it is shown in the picture with a peeler.  Don't remove the green portion.  Remove it lightly otherwise you will feel it in your tongue like tough threads, which would be irritating! We call it 'naar yedukkaradu'! Then cut the main portion like it is shown in the picture below:


Pour oil in the hot kadai.  First put the hing piece.  Let it get fried.  Then mustard.  Let it flutter/burst.  Add the urad daal, chillies and curry leaves.   Mix them properly.  When the daal is golden brown, add the cut peerkkangai pieces.  Mix it. Add the salt, turmeric powder, sugar and tamarind also.  Let it get cooked with half cup of water..see to it that the veg. doesn't get roasted. Add a bit more water if you want.  Switch off the stove.

Put all the ingredients in a mixer along with the grated or pieces of coconut.  Grind them well.  The chutney is ready.  You can wash the mixer with half more cup of water if you want the chutney to be a bit watery.


Tomato Chutney:

You can roast the ingredients like it is shown in the picture and add chopped tomatoes instead of peerkkangaai and cook.  Tamarind is not needed for this, since the tomato has got a tangy taste and add 1/2 tsp. of sugar to make it tastier. No coconut please for this chutney!

Instead of tomato, you can add cabbage/brinjal etc.  without coconut but with tamarind!

You can make coriander chutney in this method.  You can just fry the ingredients, add chopped green coriander and grind it with or without coconut...add a bit of tamarind...I always use dri-tam powder mostly for chutneys.

I had already written the recipe for Onion Chutney...the roasting ingredients are the same for most of the recipes of chutney. 

If you add 3-4 tbsp. of Tuvar daal/tuvaram paruppu instead of urad daal and grind it with a small amount of coconut, Tuvar chutney is ready! Add tamarind for this.  No tamarind only when you add tomatoes!

All these chutneys will be tasty with hot rice, with idly, dosa or Chapaati!

Enjoy and let me know if you liked them, right?!


Saturday, May 25, 2013

Thengaai dosai/neer dose/bajjari dose!

.
Thengaai Dosai with Peerkkangai thogaiyal and Sutta Kaththrikkai thogaiyal!

This is a 'very easy to make' dosa.  We don't need much ingredients too.  When we have guests, we can prepare this dosa and keep it in a casserole and serve, unlike rava dosa, raagi dosa etc.  which would be good/tasty,  just right from the tava.  Only thing is, the side dish should be a bit strong/hot, since this dosa is not prepared from sour/fermented batter, it will be bland. Many of my relatives love this dosa.  Tastes a bit like 'aappam'.

Ingredients:

1. Raw Rice - 2 cups
2. Grated coconut - 2 tbsp.
3. Cooked raw rice/saadam - 2 tbsp.
4. Sugar - 1/4 tsp.
5. Salt - 1 tsp. or according to taste.
6. Hot, boiling water - 3 cups
7. Coconut oil - 2 tbsp.

METHOD:

Soak the rice for 4 hours at least.  You can soak at night and grind and make the dosa in the morning.  Or soak it in the morning and grind in a mixer and make the dosa in the evening or night.  It is better to grind and make dosa immediately.  You must add the coconut, cooked rice etc. and grind together.  Add salt and sugar.  Boil 3 cups of water and add to the rice batter.  The batter should be very thin.

Keep the non stick tava on the stove.  Heat should be medium.  Take the coconut oil in a cup.  Apply oil on the tava with an applicator, shown in the picture below or with the head/top of a brinjal.  You can hold the top and use it as a stem, dip it in oil and apply on the tava. Pour the watery batter, like you do for rava dosa, on the tava.  Close with a lid for half to one minute.  You will know how long to keep after one or two dosas. Lift the lid and take out the dosa.  Store them in a casserole.  Apply oil again and make the next dosa.  Dosas are ready!

You can eat the remaining dosa even after 4- 5 hours.  They will be tasty. Not much oil is used in this dosa.  Very easy to digest.


The batter should be watery.
Oil applicator in wood.  It is available in vessel shops. This way only very less oil can be used.
The dosa should be covered for half minute.  The dosa will not get roasted, but will be soft.
Non-stick tava is good for this dosa. The dosa will slide down into the casserole! The work will be over very fast!
Dosas are ready to eat!

You can have this dosa with any hot chutneys like Onion Chutney, sutta kaththrikkai thogaiyal (Burnt brinjal chutney), peerkkangai thogaiyal (Ridgegourd chutney) or anyother hot chutney.  Some like it with coconut milk (Coconut milk with jaggery).  Or More kuzhambu, vaththal kuzhambu etc.

Try this and tell me how it came out and whether you liked it.